

Discharge printing removes a shirt’s dye and replaces it with pigment to create an ultra-soft print that feels like part of the fabric. It’s the go-to method when a brand wants a vintage, worn-in look with zero plastic hand, but it only works reliably on 100% cotton with compatible reactive or direct dyes. If your blanks are poly-blend or pigment-dyed, discharge is the wrong tool for the job.
TL;DR:
- Discharge printing works best on 100% cotton with reactive or direct dyes, and is unreliable on poly-blends, pigment-dyed, or overdye garments.
- Achieving consistent results requires precise control of mix ratio, mesh size, and heat, along with thorough wash and snap tests before mass production.
- Ventilation and safety gear are essential because activators can release formaldehyde-related fumes during mixing and curing.
- Discharge output varies with fabric color and dye lot, making strict testing and supplier consistency critical for multi-SKU brands.
- Fine details and small text may blur or shift, so bold lines and thorough pre-approval testing are necessary for high-resolution designs.
Table of Contents
- What Discharge Printing Shirts Actually Involves
- The Chemistry Behind Discharge Ink Activation
- Which Fabrics And Colors Discharge Well
- The Discharge Printing Workflow, Step By Step
- Fixing Uneven Discharge, Ghosting, And Screen Clogs
- Is Discharge Printing Right For Your Shirt Line?
- Dryer Types, Ventilation, And Safety Gear You’ll Need
- Preparing Artwork Files For Discharge Effects
- Cleaning Screens And Equipment After A Discharge Run
- Additives And Modifiers That Improve Discharge Results
- Where Discharge Printing Hits Its Limits
- How Muskop Approaches Discharge Printing
- Sources
What Discharge Printing Shirts Actually Involves
Plastisol ink sits on top of a shirt like a thin rubber film. Water-based ink soaks in a little but still leaves pigment resting in the fibers. Discharge does something different: it chemically strips the garment’s existing dye out of the print area, then deposits a new pigment in its place. The result isn’t a layer, it’s a replacement. That’s why a well-cured discharge print feels like it grew out of the shirt rather than sitting on it, producing what practitioners call ultra-soft prints with zero hand.
There are two flavors. White discharge just removes color, leaving a bleached, slightly heathered off-white. Colored discharge removes the original dye and drops in new pigment simultaneously, giving you a muted, washed-out tone rather than a bright, opaque one. Streetwear and vintage-inspired labels rely on discharge specifically because that faded, lived-in aesthetic can’t be faked with plastisol.
The Chemistry Behind Discharge Ink Activation
Discharge ink is a two-part system: a base loaded with a reducing agent, commonly a zinc formaldehyde sulfoxylate compound, mixed with an activator right before printing. The reducing agent is what breaks down the dye molecule in the fabric. Heat is what triggers that breakdown, and the ink stays chemically inert until it hits the dryer.
Statistic Callout: Discharge ink typically activates between 320°F and 330°F in a conveyor dryer, with a dwell time of roughly 90 to 120 seconds needed for full cure. Activation and cure aren’t the same event. Activation starts the chemical reaction; cure finishes it, setting the pigment and evaporating residual moisture. Cut the dwell time short and you get a print that looks fine off the dryer but discolors or fails a wash test days later.
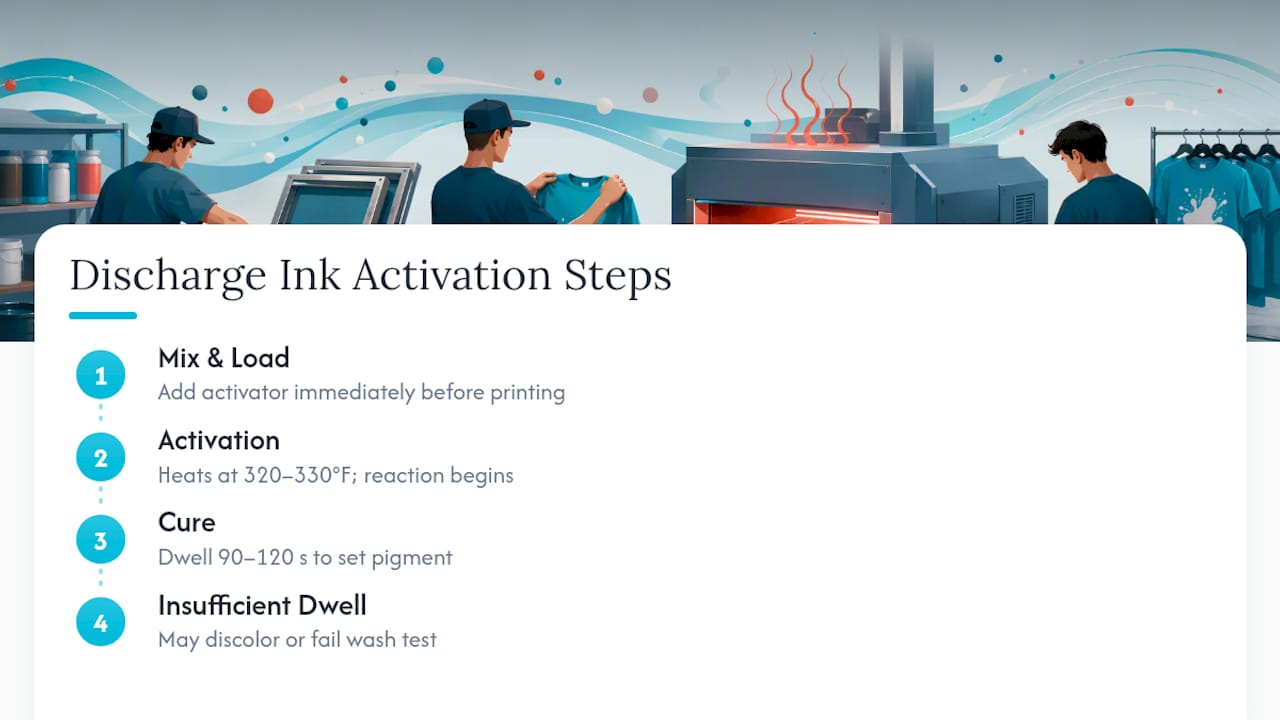
Ventilation isn’t optional here. Activators can release formaldehyde-related fumes during mixing and again during cure, so any shop running discharge needs forced-air exhaust over the dryer and gloves, at minimum, during mixing.
Which Fabrics And Colors Discharge Well
The rule of thumb: if it’s 100% cotton dyed with reactive or direct dyes, discharge will behave predictably. Wikipedia’s overview of discharge printing confirms this is a natural-fiber process at heart. Polyester resists it almost entirely because synthetic dyes bond differently, and pigment-dyed or over-dyed cotton (the kind used for that faded, garment-dyed look) often only partially discharges, leaving a dull gray shadow instead of a clean result.
Some colors cooperate more than others:
- Navy, black, and red cotton tees usually discharge to a clean, even base tone.
- Turquoise and some purples are notoriously inconsistent and can leave a greenish or muddy cast.
- Poly-cotton blends over 20% polyester usually show visible ghosting where the poly fibers hold their original color.
- Pigment-dyed or overdyed garments (see our breakdown of garment-dyed t-shirts) frequently fail to discharge at all.
Never commit to a production run without a strike-off. Print a test swatch on the exact dye lot you’re buying, since dye lots vary batch to batch and what discharged clean last season might resist this season.
The Discharge Printing Workflow, Step By Step
Running discharge well comes down to controlling three variables: mix ratio, mesh, and heat. Here’s the sequence a shop should follow:
- Mix base and activator according to the manufacturer’s ratio, then let the mixture rest 10 to 15 minutes before printing. This settling period, standard shop practice at Impressions Expo demonstrations, gives you consistent flow off the squeegee.
- Track pot life closely. Once activated, discharge ink has a limited working window, often just a few hours. Mix only what you’ll use that shift.
- Set up screens with the right mesh. Use 110 to 230 mesh for standard spot-color work, and push up to 305 mesh for fine CMYK detail on dark garments.
- Dial in squeegee durometer, typically a 60/90/60 tri-durometer blade, for even ink deposit without flooding the stencil.
- Print, then run through a forced-air conveyor dryer at 320°F to 330°F with 90 to 120 seconds of dwell.
- Verify with a snap test and a wash test before releasing the run. Stretch the print; if pigment cracks or flakes, the cure was incomplete.
Pro Tip: Run your wash test through a full hot-water cycle using dissolvable laundry sheets, not a quick rinse. Discharge prints that survive a gentle cycle can still bleed or fade under the heat and agitation of a real laundry day.
Fixing Uneven Discharge, Ghosting, And Screen Clogs
Patchy discharge almost always traces back to heat, not ink. If one part of a shirt discharges clean and another stays dull, check your dryer’s airflow before you touch the ink formula. Steam has to escape the shirt during cure, and uneven airflow traps moisture and causes ghosting, that faint shadow of the original color bleeding back through.
A few other common issues and fixes:
- Screens clogging mid-run usually means the activated ink sat too long. Rinse and re-emulsion if flow drops noticeably.
- Emulsion breakdown from the reducing agent is real. Use a dedicated discharge-rated emulsion, not a standard plastisol stencil.
- Partial discharge on blends (that stubborn 80/20 cotton-poly tee) rarely fixes itself. Budget for a plastisol-discharge hybrid ink instead of forcing a pure discharge result.
Pro Tip: Keep a logbook of dryer temp, dwell time, and mesh count for every discharge job. When a run fails a wash test three weeks later, that log is the only way to isolate whether it was heat, mesh, or a bad dye lot.
Is Discharge Printing Right For Your Shirt Line?
Discharge earns its reputation on feel. Prints are soft, breathable, and hold up through repeated washing once properly cured, and the muted, vintage tone is hard to replicate with any other ink system.
The tradeoffs are real too:
- Limited to cotton and cotton-dominant blends, cutting out most athletic and performance fabrics.
- Requires forced-air ventilation and careful activator handling, raising the safety and equipment bar for a shop.
- Demands strike-off testing on every dye lot, adding time that plastisol jobs skip.
A simple decision rule: if your blank is 100% cotton with a reactive dye and your dryer has forced-air exhaust, discharge is worth running. If any of those three pieces is missing, look at plastisol, water-based ink, or a hybrid instead.
Dryer Types, Ventilation, And Safety Gear You’ll Need
Infrared-only dryers struggle with discharge because they heat the surface faster than they move air, which traps the fumes the reaction releases. A forced-air conveyor dryer is the standard for a reason: it hits the required temperature while actively pulling moisture and gas away from the print.
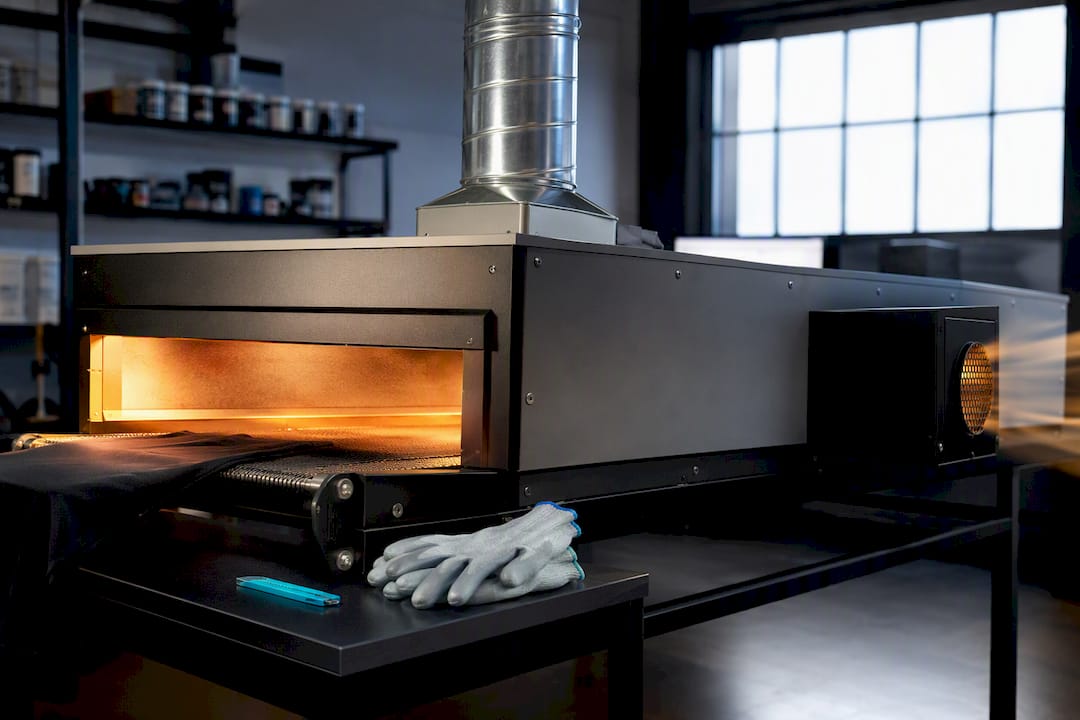
Statistic Callout: Target a cure window of 320°F to 330°F for 90 to 120 seconds, and confirm actual belt temperature with a donut probe rather than trusting the dryer’s display alone.
Minimum shop safety setup:
- Exhaust fans or a dedicated hood over the dryer exit, not just a shop fan.
- Nitrile gloves during mixing, since activators can irritate skin and release fumes.
- Eye protection when pouring or scooping activator powder.
- A well-ventilated mixing station separate from the press area.
Preparing Artwork Files For Discharge Effects
Discharge behaves differently depending on the base color of the shirt, so artwork prep has to account for it. On dark garments, printers typically lay a discharge underbase under CMYK process colors instead of a heavy plastisol white, which keeps photographic detail vibrant without the plastic feel a white underbase adds.
A few things designers need to build into files:
- Choke the discharge underbase slightly so it doesn’t peek out past the CMYK layer as a visible white halo if registration shifts.
- Use high mesh counts, up to 305, for fine halftone detail in process work.
- Expect softer edges on gradients. Discharge naturally produces tonal fades and vintage-style texture rather than crisp, hard-edged color.
Cleaning Screens And Equipment After A Discharge Run
Discharge ink is harder on equipment than plastisol, and skipping cleanup steps shortens screen life fast. The reducing agent in the ink doesn’t just react with garment dye, it can also degrade standard emulsion over time if left to sit.
Rinse screens immediately after a run, before the ink has a chance to dry in the mesh. Use cool water first; hot water can accelerate emulsion breakdown on screens that have already been weakened by repeated discharge exposure. A pressure washer set to a moderate setting clears out mesh openings faster than a hand sprayer, especially on the higher mesh counts (230 to 305) used for detail work.
Check your emulsion choice before you even start a discharge job. Dual-cure or discharge-rated emulsions hold up far better across multiple runs than standard diazo emulsions, which can pinhole or soften when repeatedly exposed to the ink’s chemistry. If you’re running discharge regularly, it’s worth reserving a set of screens exclusively for that ink and never cross-using them for plastisol jobs, since residue transfer between ink types causes contamination and misprints.
Squeegees need attention too. The durometer blades used for discharge (that 60/90/60 tri-durometer setup) should be wiped down and inspected for nicks after every shift, since a damaged edge shows up immediately as streaking on the next print. Flood bars and ink troughs should be scraped clean rather than left with dried activator residue, which can flake into the next batch and cause spotting. Store screens vertically in a dry rack away from direct sunlight, since UV exposure combined with leftover ink residue speeds up emulsion degradation.
Finally, don’t ignore the dryer belt. Discharge fumes can leave a light residue on conveyor belts over time, and a periodic wipe down with a mild degreaser keeps that residue from transferring onto the next batch of shirts.
Additives And Modifiers That Improve Discharge Results
Straight discharge base works fine for simple spot-color jobs, but most shops keep a small set of modifiers on hand to solve specific problems.
Curable reducer cuts viscosity for finer mesh work without weakening the discharge reaction, useful when you’re pushing detail through 230 to 305 mesh for CMYK-on-black jobs. Soft-hand additive pushes the print even softer for brands chasing that just-out-of-the-wash feel, though it can slightly reduce color saturation, so it’s worth testing on a swatch first.
For jobs where pure discharge won’t get you enough opacity, a discharge-plastisol hybrid blends a small percentage of plastisol into the base. This sacrifices some of the zero-hand feel but buys back color predictability, particularly useful on garments with inconsistent dye lots where straight discharge produces patchy results. Catalyst boosters can speed up the reducing agent’s reaction time, shortening the dwell needed at the dryer, though pushing this too far risks under-curing the print if temperature isn’t raised to match.
One modifier worth flagging for troubleshooting rather than enhancement: pigment concentrate boosters, added when a colored discharge print is coming out too faint or washed out on a stubborn dye lot. These need careful ratio control since overloading pigment concentrate can leave a slightly stiffer hand, undercutting the entire reason a brand chose discharge in the first place.
None of these additives fix a fundamentally incompatible fabric. If a poly-blend garment resists discharge outright, no modifier in the base will change that. Additives solve fine-tuning problems on fabrics that were already good discharge candidates to begin with.
Where Discharge Printing Hits Its Limits
Discharge has a color ceiling that catches new brands off guard. Because the process depends on removing an existing dye rather than laying down opaque ink, you’re always working within what the garment’s base color allows. A navy shirt discharges to a warm off-white. A black shirt discharges to a slightly different tone depending on the dye formula used by that specific manufacturer, which means two “black” shirts from different suppliers can discharge to visibly different shades.
This makes multi-SKU consistency one of the biggest design headaches in discharge work. A design approved on one blank supplier’s black tee might look noticeably different when that supplier switches dye lots or you move production to a second vendor. Brands running discharge at scale need to either lock in a single blank supplier or accept a documented range of acceptable color variation across production runs.
Fine detail and small text are also risky. Because discharge relies on a chemical reaction spreading through fabric fibers rather than ink sitting cleanly on a surface, very fine lines or small serif text can blur slightly at the edges compared to a crisp plastisol print. Designers working in discharge should favor bolder line weights and avoid type below a certain point size for anything meant to stay legible after washing.
Color-blocking across a design also needs planning. Because some colors discharge cleanly while others resist or shift unexpectedly (turquoise and certain purples are the usual culprits), a multi-color design spanning several discharge zones can end up with visibly inconsistent tonal quality between elements. The safest approach is testing every color zone in the design against the actual blank, not just the dominant color, before committing to a production run.
How Muskop Approaches Discharge Printing
Some brands reach for discharge on tees where the design calls for a lived-in, vintage finish rather than a bold graphic pop. Certain artwork, especially pieces built around pop culture and activism themes, reads better faded into the shirt than printed on top of it. The brand documents garment care and printing choices through resources like its guide to washing graphic tees, helping customers keep that soft hand intact wash after wash. For shirts where discharge isn’t the right fit, Muskop’s screen print versus DTG comparison breaks down the alternative.
— Robert
Sources
For supplier-level technical detail, see the Impressions Expo deep dive on discharge printing and ScreenPrinting.com’s guide on when to use discharge ink.