

The safest routine: turn the shirt inside out, wash it cold on a gentle or delicate cycle with a mild bleach-free detergent, and let it air-dry. Heat and friction, not detergent or age, cause most cracking and fading. If a print is vintage, embellished, or otherwise irreplaceable, hand wash it instead of trusting the machine.
TL;DR:
- Washing graphic tees in cold water on a gentle cycle with low spin speed significantly reduces cracking, peeling, and fading of prints.
- Hand washing is recommended for vintage or high-value prints to prevent damage from machine agitation and high heat.
- Air drying and avoiding direct heat or prolonged sunlight preserve print quality and improve the shirt’s lifespan.
- Different print types require tailored care; DTF and HTV are more fragile and should be handled more delicately than screen printing or sublimation.
- Washing infrequently, storing properly, and using the right detergent are more effective than expensive fabric in maintaining new-looking prints.
Table of Contents
- The Quick Routine for How to Wash Graphic Tees
- How to Machine-Wash Graphic Tees Safely
- Hand Washing Vintage or High-Value Prints
- Drying and Ironing Without Damaging the Print
- Removing Stains Without Wrecking the Design
- How Print Type Changes Your Care Routine
- How Often to Wash and Store Graphic Tees
- Why Imuskop Cares About How You Wash Your Tees
- How to Iron and Steam a Graphic Tee Safely
- What I’ve Learned About Keeping Tees Looking New
- See Imuskop’s Graphic Tees Built to Hold Up Wash After Wash
- Sources
The Quick Routine for How to Wash Graphic Tees
You don’t need a laundry degree to protect a print, just a consistent process. Run through these steps every time and you’ll cut print damage dramatically.
- Turn the tee inside out and check the care label for fabric-specific warnings.
- If it’s a brand-new print, wait 24 to 48 hours before the first wash so the ink has time to cure.
- Sort by color and weight, keeping printed tees away from jeans, towels, or anything with zippers.
- Set the machine to cold water on a gentle or delicate cycle with a low spin speed.
- Add a mild, bleach-free liquid detergent. Skip the fabric softener entirely.
- Drop delicate or heavily printed shirts into a mesh laundry bag for extra protection.
- Remove promptly when the cycle ends and hang or lay flat to air-dry.
That’s the whole system. Everything else in this guide just explains why each step matters and how to adjust it for specific print types.
How to Machine-Wash Graphic Tees Safely
Hot water swells cotton fibers and softens the plastisol or adhesive layer under most prints, which is exactly when cracking and peeling start. Cold water and a gentle cycle keep that layer stable and cut down on the mechanical rubbing that wears down ink over dozens of washes. Agitation is the other half of the problem. A high spin speed flings wet, heavy shirts against the drum wall, and that repeated impact is a major driver of both shrinkage and print distortion, according to Whirlpool’s laundry research.
A few habits make a real difference in the wash:
- Keep spin speed low when your machine allows manual settings.
- Never overload the drum. Crowded loads mean more friction between garments.
- Choose liquid detergent over powder. Liquid dissolves fully in cold water, while powder can leave residue that dulls prints over time, per TechGeeksApparel’s care guide.
- Wash similarly weighted tees together so heavier fabrics don’t bang around lighter ones.
Pro Tip: A mesh laundry bag isn’t just for delicates. Drop any tee with a large front print into one and it takes far less friction damage over its lifetime, according to DTF Virginia’s care recommendations.
Machine washing works fine for most everyday graphic tees. Save hand washing for anything vintage, one-of-a-kind, or covered in foil, glitter, or heavy embellishment.
Hand Washing Vintage or High-Value Prints
Hand washing gives you total control, which matters when a print can’t be replaced. Fill a basin with cold water and a small amount of mild detergent, then turn the shirt inside out before it goes in.
- Soak the shirt for 10 to 15 minutes, gently agitating the water with your hands. Never scrub directly on the design.
- Rinse thoroughly under cold water until the water runs clear.
- Press out excess water by hand. Do not wring the fabric.
- Roll the shirt in a dry towel and press gently to pull out more moisture.
- Lay flat or hang to dry.
This method is standard practice for preserving printed designs that a washing machine would otherwise chew through in a few cycles.
Drying and Ironing Without Damaging the Print
Air drying is the single best thing you can do for a graphic tee. Hang it by the hem or lay it flat, since hanging from the shoulders on a wire hanger over time causes bumps and stretching around the neckline. Dryer heat is the leading cause of cracking and peeling across nearly every print type, so if you’re short on time, that’s the tradeoff you’re making.
If a dryer is unavoidable:
- Use the lowest heat setting or an air-fluff cycle with no heat at all.
- Pull the shirt out while it’s still slightly damp and let it finish drying on a flat surface.
- Never iron directly on a printed design. Turn the shirt inside out first, or lay a thin pressing cloth over the print if you’re ironing from the front.
- Steam instead of ironing when you can. It smooths wrinkles without direct heat contact on the ink.
- Keep tees out of direct, prolonged sunlight. UV exposure fades both the fabric dye and the print pigment.
Removing Stains Without Wrecking the Design
Treat stains before they hit the wash, and treat the fabric, not the print. Always work from the back of the fabric, blotting and dabbing rather than rubbing, which just pushes the stain deeper and abrades the ink on the front.
- Grease or oil stains respond well to a drop of mild dish soap worked in gently.
- Sweat marks lift with a diluted white vinegar solution.
- Set-in stains usually need an oxygen-based pre-soak rather than scrubbing.
- Skip chlorine bleach and harsh solvents on or near any printed area. They break down ink and adhesive bonds fast, even on cotton that can otherwise handle bleach fine.
Test any treatment on a hidden seam allowance first. What’s safe on plain cotton isn’t always safe two inches away on a print.
How Print Type Changes Your Care Routine
Not every graphic tee is built the same way under the design, and that changes what “safe” washing actually looks like. Screen printing uses a thick plastisol ink that sits on top of the fabric and holds up well overall, but it still softens and cracks under high heat over repeated washes. Direct-to-garment (DTG) ink bonds into the fibers themselves, which means it looks and feels softer but responds best to consistently cold, gentle cycles rather than the tougher wash a screen print can occasionally tolerate. Direct-to-film (DTF) and heat transfer vinyl (HTV) sit as a film layer above the fabric, making them the most prone to peeling of the group. Sublimation is the outlier: the dye actually infuses into the fabric fibers, so it tolerates machine drying noticeably better than the others, though gentle care still extends its life.
| Print type | Where the ink sits | Best care approach |
|---|---|---|
| Screen print (plastisol) | On top of fabric | Cold wash, avoid high heat, durable overall |
| DTG | Bonded into fibers | Cold, gentle cycle every time |
| DTF / HTV | Film layer on surface | Hand wash or gentle cycle, air-dry only |
| Sublimation | Infused into fibers | Machine-friendly, gentle cycle still helps |
If you’re not sure which method made your tee, treat it like DTF and air-dry. You’ll never damage a more durable print by being cautious, but you can absolutely wreck a delicate one by guessing wrong. For a deeper look at how these methods differ in durability, DTF and DTG printing each have distinct strengths worth understanding before you build a wash routine around them.
How Often to Wash and Store Graphic Tees
Most graphic tees don’t need washing after every single wear. Unless a shirt is visibly soiled or sweaty, airing it out between wears and washing after one or two uses reduces the total number of wash cycles a print has to survive over its life.
- Fold tees for storage rather than hanging them long-term to avoid shoulder stretching.
- Store in a dark, dry space, since light and humidity both accelerate fading.
- Rotate your favorites into regular use instead of wearing the same one on repeat.
- Give a freshly printed tee 24 to 48 hours before its first wash so the ink fully cures.
Simple habits like these do more for a tee’s lifespan than any specific detergent brand.
Why Imuskop Cares About How You Wash Your Tees
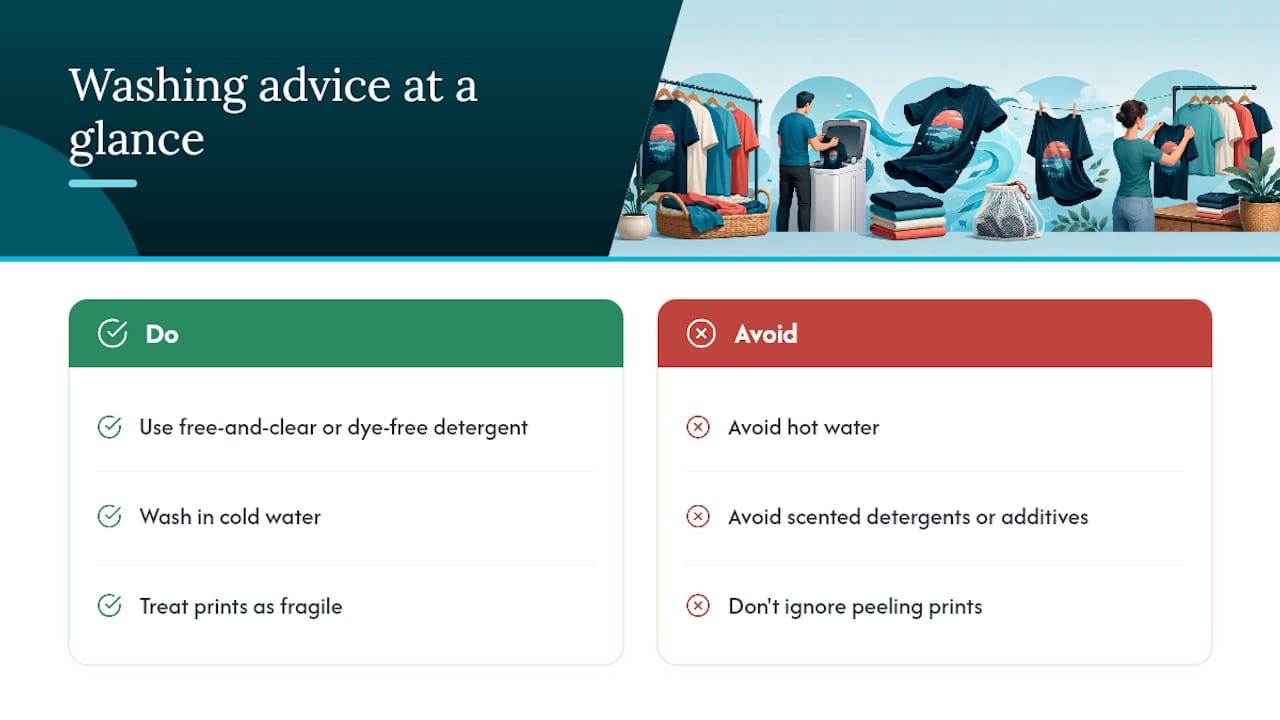
Imuskop builds graphic tees around original artwork and solid materials, which means the care advice above isn’t theoretical for us. A print that peels after six washes reflects as poorly on us as it does on your closet. If you’re shopping for detergent, look for something labeled free-and-clear or dye-free. It dissolves cleanly in cold water and won’t leave residue on darker prints, a small habit that pairs well with browsing Imuskop’s full lineup of graphic tees.
How to Iron and Steam a Graphic Tee Safely
Ironing is where most people accidentally ruin a print they’ve otherwise cared for correctly. Direct heat from an iron plate can melt plastisol, warp vinyl transfers, and scorch DTG ink in seconds, and the damage is permanent the moment it happens.
The rule is simple: the iron never touches the print directly. Turn the shirt inside out first, then iron the back of the fabric on a low to medium cotton setting. If you need to press the front for any reason, such as flattening a stubborn wrinkle right at the edge of a design, lay a thin cotton cloth or a piece of parchment paper over the printed area before the iron makes contact. That barrier spreads out the heat and keeps the plate from fusing directly to the ink.
Steaming is the gentler option and works for the vast majority of wrinkle situations. A handheld garment steamer or the steam function on an iron held a few inches away smooths fabric using moisture and indirect heat rather than direct plate contact. This is especially useful for DTF and HTV prints, which are the most vulnerable to melting or lifting under an iron’s direct heat.
A few finishing notes:
- Let the shirt cool completely before folding after ironing or steaming.
- Avoid pressing directly over seams or hems where extra fabric layers trap more heat.
- If a print already shows small cracks, skip ironing that area altogether. Heat will only widen existing damage.
- For heavily wrinkled cotton, a quick reshape while slightly damp from the wash often eliminates the need for ironing at all.
What I’ve Learned About Keeping Tees Looking New
Small laundry habits do more to keep a favorite tee alive than any premium fabric ever could. I’ve watched people baby a $40 print with the wrong wash cycle and ruin it in eight washes, while a cheaper tee lasted years on cold water and air drying alone. Start with one habit: wash inside out, skip the dryer. Everything else follows from there.
— Robert
See Imuskop’s Graphic Tees Built to Hold Up Wash After Wash
A print only stays sharp if the shirt underneath is worth the effort, and that’s where a lot of cheap streetwear falls apart before your laundry routine even gets tested. Imuskop builds every design on quality blanks meant to survive real wear, not just a photoshoot, and ships every order free with interest-free payment options available at checkout.

Every graphic tee on the site comes from original artwork, whether you’re drawn to activism-driven statements or artistic prints that don’t show up anywhere else. If you want a shirt that still looks sharp after a season of regular washing, browse Imuskop’s full collection and pick your next favorite before checkout.