

Four numbers decide whether a T-shirt fits: chest (armpit to armpit), body length (high point of the shoulder to the hem), shoulder width (seam to seam), and sleeve length (shoulder seam to cuff). The fastest way to get them right isn’t measuring your body. It’s grabbing a tee you already own and love, laying it flat, and measuring that.
This benchmark-tee approach works because a favorite tee’s flat garment numbers act as a more reliable baseline than body measurements alone, since every brand builds in a different amount of ease. Here’s the quick math to know before you start:
- Chest: measure flat, pit to pit, then double it for approximate body circumference
- Length: high point of shoulder straight down to the hem
- Shoulders: seam to seam across the back
- Sleeve: shoulder seam to the end of the cuff
Pro Tip: Record everything in inches AND centimeters in one note on your phone. Half the sizing headaches with international brands come from mixing up units halfway through checkout.
Key Takeaways
Measuring a favorite tee laid flat and recording chest, length, shoulder, and sleeve numbers beats guessing from body measurements alone every time.
| Point | Details |
|---|---|
| Use a benchmark tee | Measure a shirt that already fits the way you like instead of measuring your body directly. |
| Know your four numbers | Chest, body length, shoulder width, and sleeve length cover nearly every fit question. |
| Convert flat to circumference | Double the flat chest measurement to estimate body circumference and account for 2 to 4 inches of ease. |
| Match chart type first | Confirm whether a size chart uses flat or circumference numbers before comparing anything. |
| Check Imuskop product pages | Imuskop lists garment measurements and model-fit notes so you can compare your benchmark before ordering. |
Table of Contents
- Tools and Setup for Measuring a T-Shirt
- How to Measure a T-Shirt Laid Flat, Step by Step
- Garment Measurements vs. Body Measurements: What’s the Difference?
- How to Read a T-Shirt Size Chart Correctly
- Fit Types: Slim, Regular, Relaxed, and Tall
- Common T-Shirt Measuring Mistakes
- Measuring Graphic Tees for Print Placement
- How to Measure Different T-Shirt Styles
- How Fabric Affects T-Shirt Measurement Accuracy
- Why the Benchmark-Tee Method Beats Guessing Your Body
- Check Fit Before You Buy From Imuskop
- Sources
Tools and Setup for Measuring a T-Shirt
You need two things: a cloth or flexible tape measure and a flat, hard surface like a table or clean floor. Skip the rigid metal tape from your garage; it won’t follow the shirt’s curves without stretching the fabric.
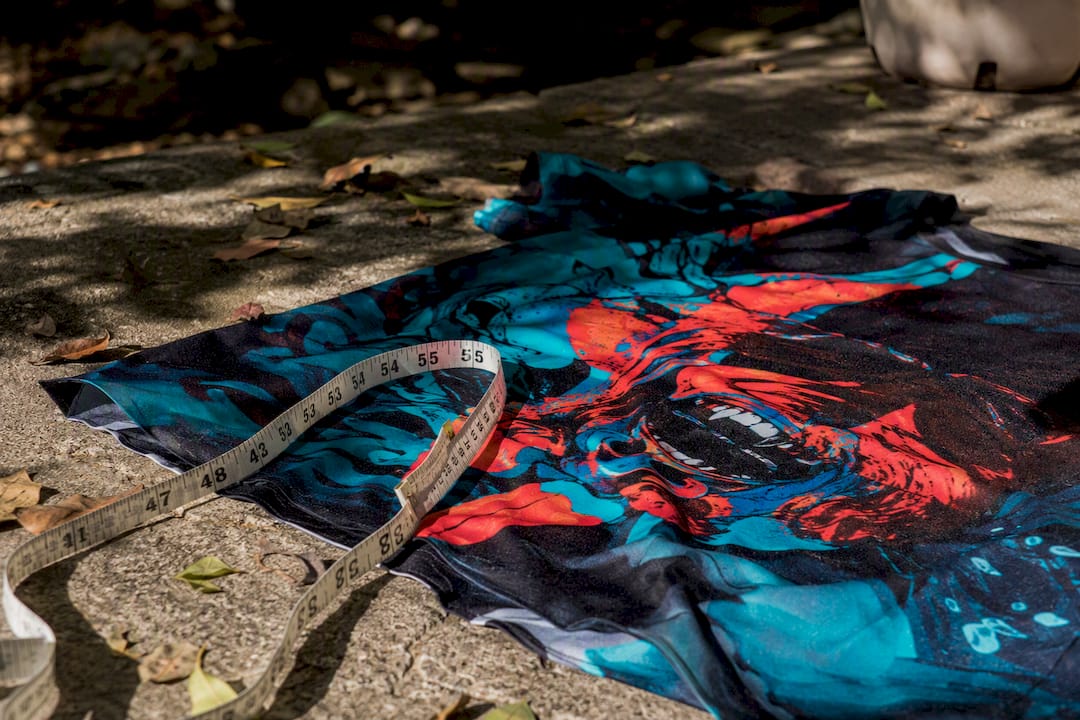
Pick your benchmark tee carefully. It should be a shirt you already wear the way you like, whether that’s fitted or a little roomy, not one that’s shrunk in the dryer or stretched out from age. Smooth out wrinkles by hand. Don’t tug or pull.
Before you pick up the tape, decide on inches or centimeters and stick with it. A quick setup checklist:
- Flat, hard surface (table beats bed or carpet)
- Soft tape measure, not a rigid one
- A benchmark tee that still fits the way you want
- A phone note or spreadsheet to log results for future orders
How to Measure a T-Shirt Laid Flat, Step by Step
Getting consistent numbers comes down to sequence. Follow the same order every time and you’ll be able to compare tees across brands without guessing.
1. Lay the shirt flat and square. Button or zip anything that needs it, then smooth the shirt on your table so the front is centered and the sides hang evenly. Fold it along the natural center crease and check that both sleeves line up. If one side is longer than the other, the shirt isn’t square, and every measurement after this will be off.
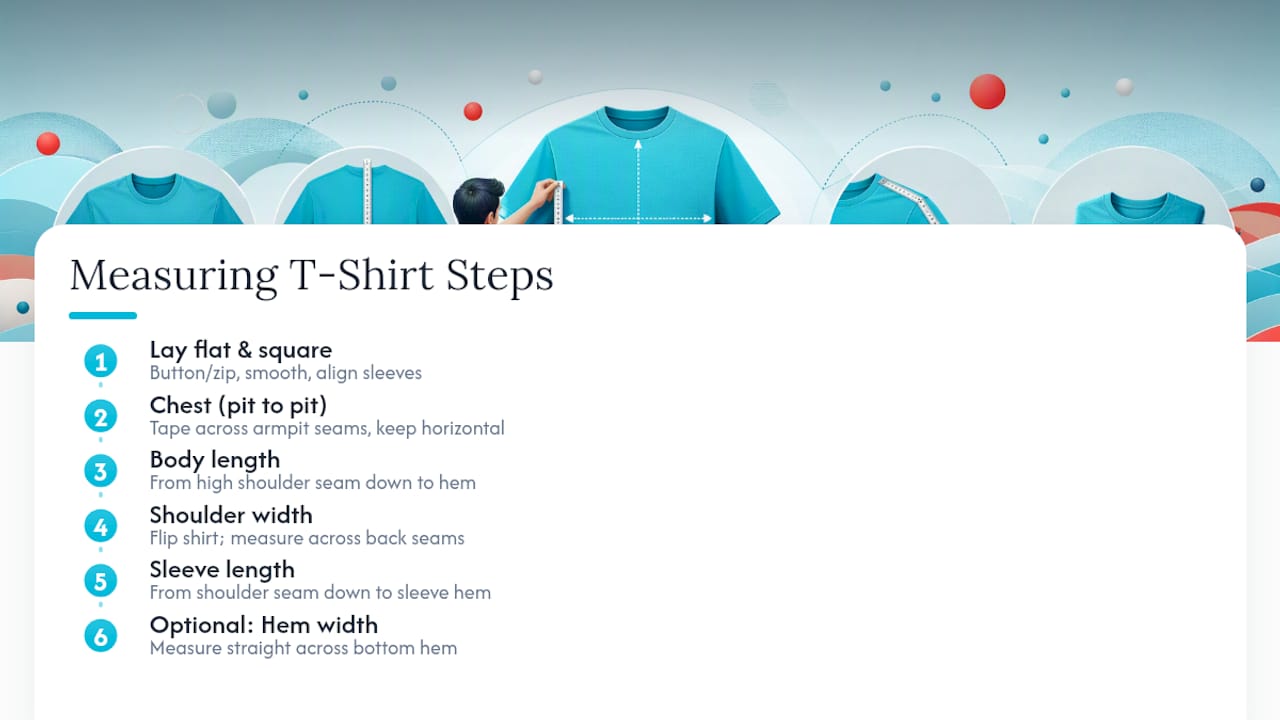
2. Measure the chest (pit to pit). With the shirt still buttoned up front-facing, run your tape straight across from one armpit seam to the other, just below where the sleeves attach. Keep the tape horizontal and relaxed against the fabric. This is the step Printful recommends for sellers building their own size charts, and it’s the single most important number for choosing between sizes.
3. Measure body length. Find the highest point of the shoulder seam next to the collar, then run the tape straight down to the bottom hem. Keep the tape vertical. Don’t follow the curve of the side seam. A shirt with a slight taper will read shorter if you follow the curve instead of a straight vertical line.
4. Measure shoulder width. Flip the shirt over. Measure from one shoulder seam straight across the back to the other shoulder seam. This number matters most for drop-shoulder or oversized styles, where the seam sits well past your actual shoulder bone.
5. Measure sleeve length. Starting at the shoulder seam, run the tape down the sleeve to the hem. Some brands measure from the center back of the collar instead, so check which method a size chart uses before comparing numbers. Whichever start point you pick, use the same one every time you measure a new shirt.
6. Optional: measure the hem width. Some tees taper slightly at the bottom for a fitted look. Measuring straight across the hem tells you whether a shirt will sit boxy or narrow at the waist, useful if you tuck your shirts in or wear them layered.
Write down every number next to the shirt’s name or brand as you go. A measurement floating with no reference point is useless three weeks later when you’re comparing it to a new size chart.
Garment Measurements vs. Body Measurements: What’s the Difference?
A “flat” garment measurement is half the shirt’s actual circumference, since the fabric is folded in on itself when it’s lying on a table. Double your flat chest number and you get roughly the body circumference the shirt is built to fit, a conversion MFG Merch uses across most standard size charts.
That gap between the flat number and your body isn’t a mistake. It’s ease, the built-in room a shirt needs to avoid feeling like a wetsuit. Regular fit tees typically carry 2 to 4 inches of ease over your actual chest circumference. A slim fit runs tighter, an oversized cut runs looser.
This is exactly why measuring your own body with a tape measure often leads you astray. Two brands can list “chest: 40 inches” on their size charts and mean completely different things depending on how much ease they build in. Measuring a benchmark tee sidesteps that problem entirely, because you’re comparing garment to garment.
How to Read a T-Shirt Size Chart Correctly
Before you compare a single number, figure out whether the chart shows flat garment measurements or full body circumference. Mixing the two is the fastest way to order the wrong size, since a “20 inch chest” on a flat chart and a “40 inch chest” on a body chart could describe the exact same shirt.
Once you know which type you’re looking at, work through your numbers in this order:
- Chest first. Match your benchmark chest measurement to the chart within about 1 inch. This is your primary anchor.
- Length second. Check it against your height and whether you plan to tuck the shirt in or wear it untucked.
- Shoulders and sleeves last. These matter most for drop-shoulder, raglan, or long-sleeve styles where fit through the arms changes the whole silhouette.
If you land between two sizes, think about what you actually want. Size up for a more relaxed, layerable look or if you plan to wear the tee over another shirt. Size down if you want a slim, tailored line and don’t mind less breathing room. Brands that publish a sizing line-up with model height and weight alongside the chart make this decision far easier, since you can match your own build to a real person wearing that size.
Fit Types: Slim, Regular, Relaxed, and Tall
The same chest measurement can produce four completely different shirts depending on the fit label. Knowing which one you’re shopping for tells you which number on the measurement list to trust most.
- Slim fit: narrower through the chest and body, tapered at the waist, minimal ease
- Regular fit: the standard 2 to 4 inches of ease, the safest default for most builds
- Relaxed or oversized fit: often 2 to 6 inches wider in the chest than the regular version of the same labeled size, with a boxier drop-shoulder cut
- Tall sizes: add length, not width, so a tall-fit medium fits the chest like a regular medium but adds an inch or two to the body length
If you’re shopping for an oversized or boxy fit t shirt, prioritize the chest and shoulder numbers over the label on the tag. A brand’s “large” in an oversized cut might measure closer to another brand’s “extra large” in a regular fit. If you’re tall and mostly worried about a shirt riding up, length matters more than chest width, so check that number first.
Common T-Shirt Measuring Mistakes
Most sizing complaints trace back to one of a handful of avoidable errors. Fix these and your numbers will actually mean something.
- Measuring around the shirt instead of across it. If a chart lists flat measurements, wrapping your tape all the way around doubles the number and throws off every comparison.
- Stretching the fabric while measuring. Pulling the tape taut against the shirt adds false inches. Lay the fabric flat and smooth it by hand instead of tensioning it.
- Using a worn-out benchmark tee. A shirt that’s shrunk in the wash or stretched from years of wear will give you numbers that don’t match how a new shirt actually fits.
- Skipping the chart when there isn’t one. If a product page has no measurements listed, check customer reviews for reported sizing or reach out to the seller directly before ordering.
Pro Tip: Keep a running log of every benchmark tee you measure, brand and all. Six months from now, you’ll thank yourself for not having to redo this from scratch every time you shop.
Measuring Graphic Tees for Print Placement
Chest and length don’t just control fit on a graphic tee. They control where the artwork actually sits on your body. A design centered on a 20 inch flat chest shirt will hit noticeably higher or lower on your torso than the same design printed on a 22 inch version, even if both are labeled “medium.”
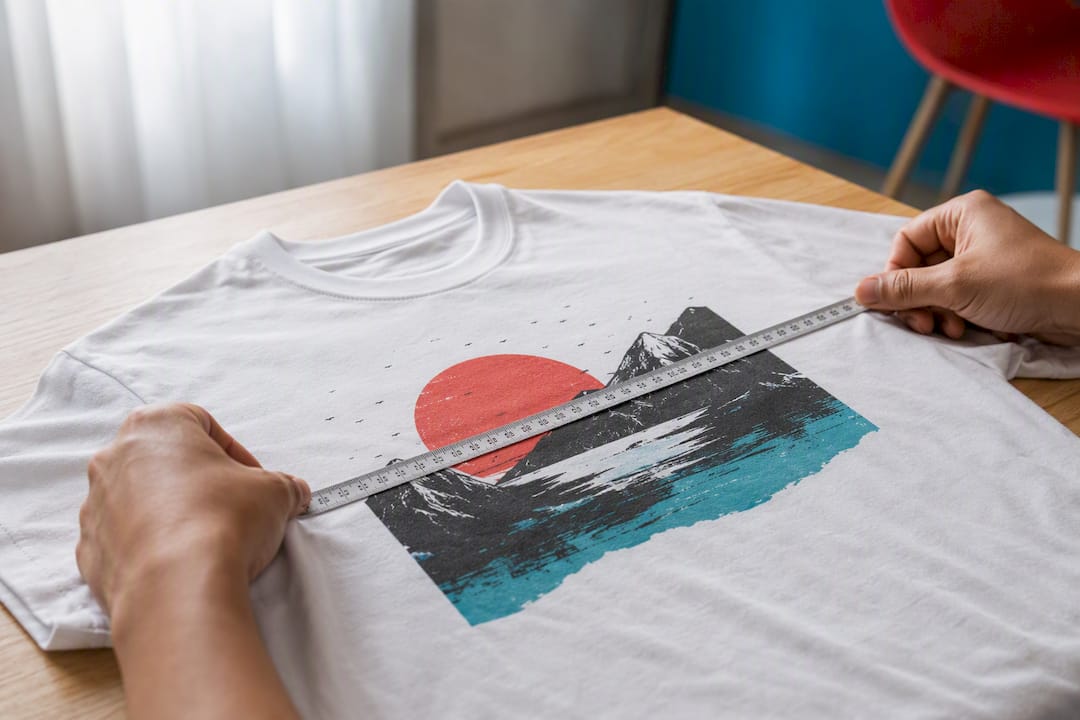
Because of that, it’s worth keeping two saved benchmark rows rather than one: both a fitted measurement and a relaxed measurement. Use the fitted row when you want a graphic to sit close to the body and read clearly. Use the relaxed row when you’re after a looser, streetwear silhouette where the print has more room to breathe across a wider chest.
This matters more for tees with large front graphics or full-back prints, where a couple of inches of extra length shifts the design lower than intended, sometimes into territory that looks unintentional rather than styled. If you’re planning to layer a graphic tee under a jacket or drop shoulder hoodie, measure with that layering in mind. A tee that fits great on its own can feel bulky once there’s a jacket over it.
Robert’s practical rule of thumb: write down the tee name, both measurement rows, and which fit you actually preferred for that style. Six shirts later, that note is worth more than any generic size guide.
How to Measure Different T-Shirt Styles
Not every T-shirt gets measured the same way once you move past the basic crew neck. The four core numbers still apply, but a few styles need small adjustments.
V-neck vs. crew neck: The measuring points barely change. Chest, length, shoulder, and sleeve all follow the same rules. The one difference is where you anchor your length measurement. On a crew neck, start at the shoulder seam next to the collar. On a deep V-neck, that starting point is the same, but the neckline itself will visually shorten the shirt even though the actual body length number is identical. Don’t let the visual trick you into remeasuring from a different spot.
Long sleeve vs. short sleeve: Sleeve length obviously matters more here. Measure from the shoulder seam straight down to the cuff, keeping the sleeve flat and uncurled. If the sleeve has a rolled or ribbed cuff, measure to the edge of the fabric, not into the ribbing, since ribbing can compress and give you a shorter number than the sleeve actually runs.
Raglan and drop-shoulder styles: These construction types move the shoulder seam away from your actual shoulder bone, sometimes by several inches. Shoulder width becomes a far more important number here than on a standard crew neck, since it directly determines how boxy or fitted the silhouette reads. Measure it carefully and don’t skip it just because it feels like a secondary number.
Tank tops and sleeveless styles: Skip the sleeve measurement entirely and pay closer attention to the armhole depth if the chart lists it, since that number affects how much shows at the sides.
How Fabric Affects T-Shirt Measurement Accuracy
A cotton tee and a cotton-poly blend can carry identical measurements on the tag and still fit differently once you’re wearing them. Fabric weight and stretch change how a shirt drapes, which changes how the same numbers translate to a look on your body.
Heavier fabrics, often measured in GSM (grams per square meter), tend to hold their shape and hang straighter, so the flat measurement you take is a closer match to how the shirt looks worn. Lighter, thinner fabrics drape more and can look larger or looser than the raw number suggests, since there’s less structure holding the shape. If you’re comparing a heavyweight tee to a lightweight one with the same chest measurement, expect the heavyweight version to look closer to true size and the lightweight one to look slightly more relaxed.
Stretch fabric complicates measuring further. A shirt with spandex or elastane content will give slightly under tape pressure, so it’s easy to pull a fabric like that taut without realizing and record a number that’s larger than the shirt’s resting shape. Lay stretch fabrics completely flat and avoid any tension on the tape.
Shrinkage is the other variable worth flagging. If you’re building your measurement log, note the fabric type next to each entry. Two shirts with the same chest number but different materials won’t necessarily wear the same.
Why the Benchmark-Tee Method Beats Guessing Your Body
Most sizing advice tells you to grab a tape measure and wrap it around your chest. That’s not wrong, exactly, but it skips the part that actually determines fit: how much ease a specific brand builds into a specific cut. Your chest circumference is a fixed number. How loose or tight a shirt feels at that circumference depends entirely on the maker’s choices, and no amount of measuring your own body tells you what those choices were.
The benchmark-tee method sidesteps that problem because it starts from a shirt whose fit you’ve already tested through actual wear. You already know it fits the way you like. The measurements you pull from it aren’t theoretical, they’re proven.
Where I think a lot of size charts fail shoppers is the labeling. A chart that just says “chest: 42 inches” with no indication of flat versus circumference is setting people up to guess wrong, and that guess turns into a return. The fix isn’t complicated: measure a tee you trust, note whether a chart is flat or circumference, and compare like to like. Skip the body tape measure entirely if you can. It’s the least reliable input in the whole process.
— Robert
Check Fit Before You Buy From Imuskop
Imuskop lists garment specs and model-fit notes directly on product pages, so you’re not stuck guessing how a graphic tee will actually sit once it arrives.

Before you check out, measure your favorite tee the way you just learned: chest, length, shoulders, sleeves. Then pull up the product page for the Muskop piece you’re eyeing and set those numbers side by side. If the graphic tee runs true to a regular fit or leans into an oversized cut, the page will tell you, so you can decide between your usual size or one size up before it ships. Head to the Imuskop storefront, pick a design, and compare your benchmark numbers against the listed measurements before you add it to your cart.
Sources
- How to measure a t-shirt: A complete guide for online sellers
- How to Measure Your T-Shirt Size — Boring Label
- T-shirt size chart - MFG Merch
- How to Measure for a T-Shirt — wikiHow